Choose custom cupcake boxes around the finished decorated cupcake, not a generic label such as mini, standard, or jumbo. Measure the wrapper base, the widest point of the cake or frosting, and the tallest topper; then match the insert cavity, internal height, piece count, board, window, and carrying structure to your actual orders. Before production, test a physical sample with the most delicate cupcakes through packing, carrying, delivery, handoff, and removal.
Brisk's Custom Cupcake Boxes page is the commercial destination for branded cupcake packaging. This guide helps bakeries, home-based cake businesses, caterers, event teams, and packaging buyers prepare a precise sample and quote brief without confusing an attractive box with a proven transport system.
1. Measure the finished cupcake, not only the baking cup
A cavity can fit the paper wrapper and still fail the decorated product. Buttercream may spread beyond the cake, piped swirls add height, and picks or fondant decorations can turn a low cupcake into a tall, top-heavy item. Baking variation also matters: one batch may rise or spread more than the sample used during an early design discussion.
Build a measurement sheet for each important cupcake family. Record:
Wrapper base diameter and shape after baking;
Widest cake diameter above the wrapper;
Widest frosting or decoration diameter;
Finished height from the bottom of the wrapper to the highest decoration;
Position, width, and flexibility of picks, toppers, or candles;
Approximate weight and whether the center of mass is high;
Whether cupcakes are chilled, room temperature, or otherwise conditioned at packing;
Expected variation across production-representative batches;
Whether different flavors, wrappers, or decorations share one box.
Measure multiple real cupcakes rather than the empty liner or baking pan. Include the largest expected frosting spread and tallest approved topper. Add working clearance deliberately: enough to prevent the lid or window from touching, but not so much that the insert and box become unnecessarily large. A prototype packed by the actual bakery team is the most useful way to confirm that balance.
Brisk's guide to measuring a box for custom packaging explains the length, width, and height sequence. For cupcakes, supplement those box dimensions with a drawing of the product profile and cavity diameter because the insert performs much of the stabilization.
2. Treat the box and insert as one system
The outer carton provides enclosure, carrying surfaces, print space, and stack resistance. The insert separates cupcakes and controls side-to-side movement. These parts should be designed and tested together. A well-fitted insert placed in an oversized outer box can shift, while a rigid box cannot compensate for cavities that are too loose or too tight.
Start the insert specification with the real wrapper geometry. A cavity should support the lower portion of the cupcake without crushing the wrapper, cutting into the cake, or allowing enough play for the cupcake to lean into its neighbor. Tapered wrappers need special attention because the diameter changes from bottom to top. Mini, regular, and jumbo are market descriptions, not dependable engineering dimensions.
Check these insert details:
Cavity diameter and shape at the support point;
Depth and height of the insert platform;
Distance between cavities at the widest frosting point;
Edge clearance between the outside cupcakes and carton wall;
Tabs or folds that keep the insert from sliding;
Finger access for placing and lifting cupcakes;
Whether removal bends the wrapper or smears frosting;
Board stiffness when every cavity is loaded;
Assembly orientation and whether staff can install it correctly at speed.
A removable insert can simplify loading in some workflows: staff may place cupcakes into the tray before lowering the full unit into the carton. In other settings, loading directly into an installed insert is faster and reduces handling. Test both methods with new and experienced staff. The preferred design is the one that protects the product without creating an awkward packing step.
3. Choose counts around the order mix
Brisk's live product record describes insert options for 4, 6, or 12 cupcakes, but the right program depends on the bakery's actual sales. A single-cupcake presentation may suit favors or counter sales. Two- and four-count formats can work for gifts and small tasting orders. Six- and twelve-count boxes may suit everyday bakery and event orders. A custom count can be discussed when order patterns justify separate tooling and inventory.
Review several months of order data if available. List the number of orders by cupcake count, decoration family, and delivery channel. A bakery that mostly sells six packs should not automatically adopt a dozen box and leave half the cavities unused. Empty cavities can create a poor presentation, and improvised filler may not stabilize the remaining products.
Also consider mixed boxes. If customers combine different flavors and frosting heights, the tallest and widest approved design should drive the clearance unless products are separated into compatible families. A fixed insert creates an orderly layout, but it may limit the ability to mix unusually large decorations with standard cupcakes. Document those exceptions during quoting rather than discovering them on the packing table.
The box style should suit the count and handling method. A folding carton with a top opening can provide good display and loading access. A handled carrier can support event handoff, but the handle, top panel, and load path need testing when fully packed. A sleeve or presentation format may create a distinctive opening sequence, although extra components can increase assembly and material use. Structure should solve a real service or branding need.
4. Select board for the structure and route
The Brisk product API lists SBS paperboard, Bux board, kraft paper, and corrugated cardboard among the available material records. These options are not interchangeable, and the supplier should confirm the exact grade and intended use for each project.
SBS paperboard offers a white, smooth print surface that can suit detailed branding and folding-carton construction. The live product specifications reference an 18pt to 22pt range, but do not treat that as a universal prescription. Box footprint, cupcake count, insert design, window opening, handle, humidity, stack, and route can change the required stiffness.
Bux board is listed as a rigid white food-packaging board option. It may be worth comparing when the pack needs more body, but the actual grade, crease behavior, insert compatibility, printing, and food-contact arrangement should be confirmed on a sample.
Kraft paper creates a natural brown visual direction and is listed as food-safe in the product material record. Its substrate color changes how inks appear, particularly pale colors, bright brand tones, and designs that rely on white. Ask for a material-specific print proof instead of judging color from a screen. Do not infer a complete environmental outcome from brown color alone; obtain project-specific sourcing and disposal information before making claims on pack.
Corrugated construction can be considered for larger counts, demanding handling, or an outer transit component. However, the same API material record notes that its listed corrugated option is not food-safe. That does not mean corrugated can never be part of a cupcake-packaging system; it means the supplier must define the approved food-contact boundary, liner, insert, or inner carton for the intended application. Never assume a material is appropriate for direct contact merely because it is used around food elsewhere.
5. Use a window without sacrificing clearance
A window can let customers inspect decoration and color before opening the box. Brisk lists clear PET window patching as an available option. The window should be positioned around the product view, score lines, glue area, lifting points, and required panel strength—not placed wherever it looks largest on a flat design.
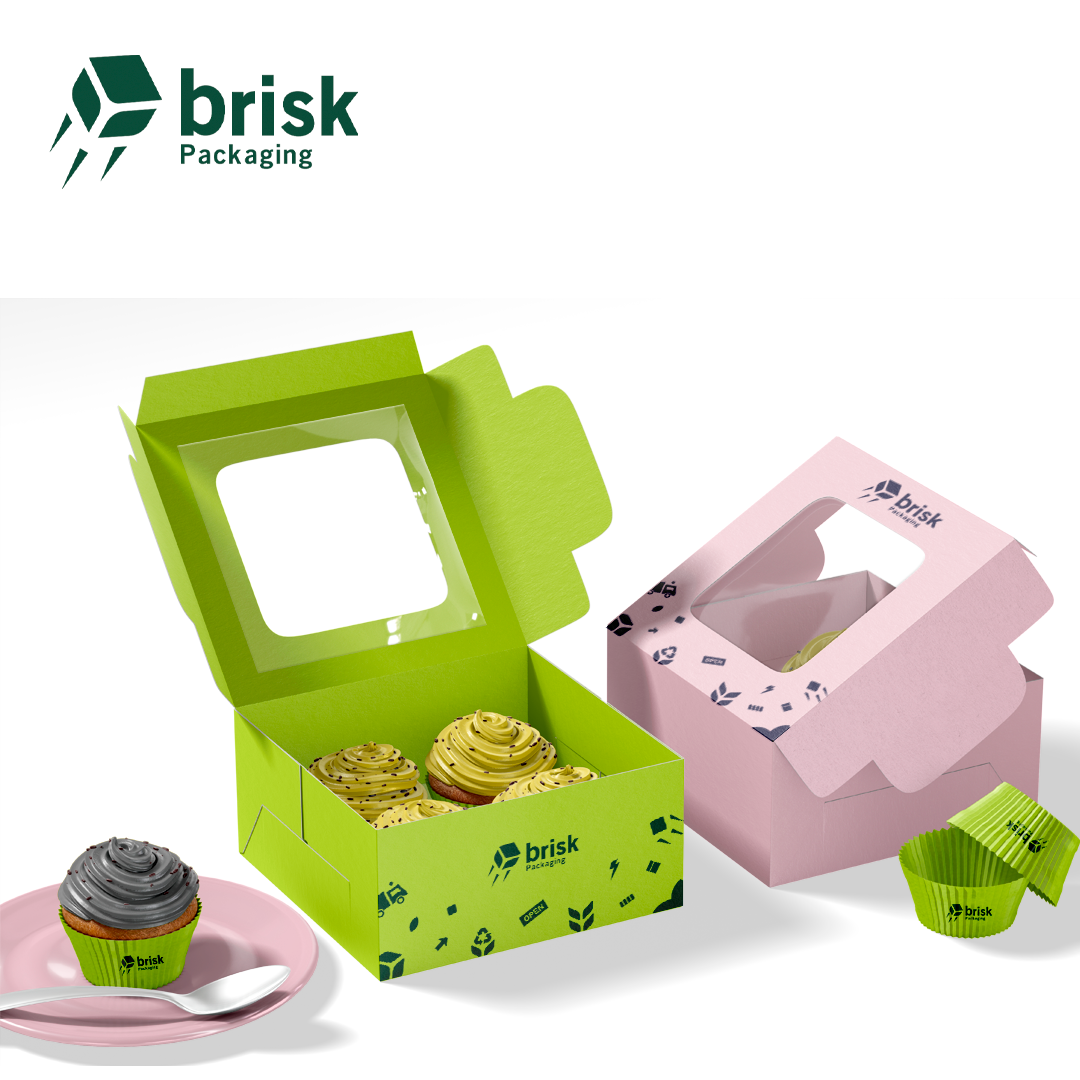
Check the tallest cupcake under the center and edges of the window. The patch may sit below the surrounding board or flex under stacking pressure. Make sure piped frosting, a topper, or a carry handle cannot contact it during normal use. For side windows, consider whether frosting can smear against the wall when the pack tilts.
Window size also affects carton stiffness. A large cutout removes board from the lid, so the package may need a different board, frame width, crease arrangement, or window geometry. Evaluate how boxes behave when stacked empty in storage and when packed for pickup. If disposal communication matters, ask how the window material and board should be separated or described in the destination market rather than making a blanket recyclability statement.
6. Plan printing and finishes around the bakery workflow
Cupcake packaging gives a bakery several useful communication zones. The top panel can carry the primary identity and a clear opening cue. Side panels can show contact details, ordering information, flavor marks, or a short care message. An insert can use color or labels to identify flavors, provided added materials do not interfere with fit or the intended food-contact system.
Choose a print process after discussing quantity, substrate, artwork detail, color accuracy, versions, and budget. CMYK may suit full-color artwork and photography; Pantone references may help when a specific brand color is critical. Brisk's CMYK vs Pantone packaging guide explains the trade-offs. Ask for a proof on the chosen white or kraft board because screen appearance does not predict the final substrate exactly.
Prepare files on the approved production dieline. Keep logos, QR codes, small text, and required information away from score lines, insert locks, glue areas, window cuts, handles, and closure tabs. The packaging artwork preparation guide provides a practical prepress checklist.
Finishes should be chosen for handling and appearance, not from a sample menu alone. Aqueous coating, matte lamination, or gloss lamination can change scuff behavior, color appearance, feel, folding, and disposal considerations. Confirm whether a coating, ink, adhesive, or film is appropriate for its intended location. Interior printing and any component near exposed food deserve a written, project-specific material review.
7. Test packing, carrying, and delivery
A tabletop fit check is necessary but incomplete. Cupcake damage often appears after acceleration, braking, cornering, a tilted handoff, or removal from the insert. Test the full journey using the real outer carton, insert, cupcakes, window, handle, bag, vehicle setup, and delivery duration.
Run a repeatable trial:
Condition and decorate cupcakes as they would be for a customer order.
Assemble the carton and insert from flat components.
Load every cavity and note finger clearance and packing time.
Close the lid without pushing on frosting or toppers.
Lift, carry, set down, and load the package using the normal bag or tray.
Simulate the expected route, including turns, stops, and handoff.
Open the box and remove cupcakes as a customer would.
Photograph and record leaning, wrapper damage, frosting contact, insert movement, lid deflection, and box scuffing.
Test the hardest realistic configuration, not only the neatest standard cupcake. Include the tallest topper, widest frosting, heaviest cake, mixed flavor set, maximum count, and any stacked or handled arrangement. If problems occur, change one variable at a time—cavity, spacing, insert height, internal height, board, window, closure, bag, or packing method—so the next test produces useful evidence.
Do not promise that a box is tip-proof or delivery-proof. Driving, temperature, product consistency, handling, and route conditions vary. The practical goal is a documented packaging system that performs acceptably in the bakery's defined operating range.
8. Understand the quote and cost factors
The price of custom cupcake packaging depends on the complete specification, including:
Internal length, width, and height;
Cupcake count and cavity layout;
Insert material, cut geometry, folds, and assembly;
Carton board grade, caliper, and exterior color;
Window shape, film, and patching;
Handle, locks, perforations, or unusual structure;
Print process, colors, coverage, and number of artwork versions;
Coating, lamination, or other finish;
Quantity by size, count, and artwork;
Prototype, proof, and packed-product testing needs;
Flat or assembled packing format, destination, and required schedule.
Compare quotes on the same specification. A lower unit price may exclude inserts, windows, tooling, proofs, packing cartons, or delivery. A larger multi-count box may also use more board and storage space than the bakery needs. Ask the supplier to identify assumptions so competing proposals can be evaluated fairly.
For a project-specific recommendation, request a Brisk quote or contact the packaging team. Send physical samples or accurate product measurements, photos, count requirements, quantities, artwork, destination, and test expectations. Ask for an insert-fit review, dieline, material-specific proof, and physical sample before approving production.
Cupcake box quote checklist
Prepare this information before contacting a packaging specialist:
Cupcake base, widest cake, frosting, and topper dimensions;
Photos and profile drawings of representative products;
Mini, regular, jumbo, or custom wrapper details with actual measurements;
Count formats and forecast quantity for each format;
Mixed-flavor and mixed-decoration rules;
Preferred cavity fit, spacing, insert loading, and removal method;
Required internal height and window position;
Board preference or request for a material recommendation;
Print files, colors, finishes, and information panels;
Food-contact boundaries and written material questions;
Pickup, event, catering, courier, or delivery route;
Handle, bag, stacking, and storage requirements;
Prototype, proof, testing, destination, and target schedule.
FAQ
Do custom cupcake boxes need inserts?
Most multi-cupcake transport packs benefit from an insert because it separates products and limits lateral movement. The exact need depends on the cupcake, box structure, count, and route. Test the cavity diameter, insert height, spacing, and finger access with real decorated cupcakes rather than relying on a nominal size label.
How tall should a cupcake box be?
Set internal height from the tallest production-representative cupcake, including frosting and toppers, then add deliberate clearance for the lid or window. There is no universal height because recipes and decorations vary. Test the closed sample and any stacking or carrying pressure before production.
What is the best material for cupcake boxes?
The best material is the one that meets the project's structure, print, food-contact, handling, and route requirements. SBS can provide a smooth white print surface; kraft creates a natural brown appearance; other rigid boards or a corrugated outer component may suit demanding packs. Confirm the exact grade and food-contact system with the supplier.
Are window cupcake boxes a good choice?
A window can improve product visibility and customer confidence, but it removes part of the board panel and must clear frosting and toppers. Test window size, patch position, lid stiffness, stacking, and disposal communication on the actual package.
Can one insert fit mini, regular, and jumbo cupcakes?
Usually not well. Those labels do not define one reliable diameter, and wrapper tapers vary. A cavity that holds a mini cupcake may crush a larger wrapper, while a jumbo cavity may allow a smaller cupcake to lean. Measure each approved product family and create compatible inserts or separate specifications where necessary.
What should I send for a custom cupcake box quote?
Send product dimensions, photos, count formats, quantity by format and artwork, desired board, insert and window needs, print files, food-contact questions, route, destination, and schedule. Request a dieline, material-specific proof, insert-fit review, and packed-product sample test.
Final takeaway
A custom cupcake box succeeds when the cupcake, insert, carton, window, artwork, bakery workflow, and delivery route are designed as one system. Begin with real decorated-product measurements, engineer cavity and removal access, choose counts from actual orders, and test the hardest realistic journey. Brisk can review your dimensions, insert plan, dieline, material, artwork, and sample needs before providing a project-specific quote.